Breaking News
Loading...

Recent Post

Wednesday, 12 February 2014
Trace Any Mobile Number With Name And Location

Trace Any Mobile Number With Name And Location

Hello friends! We always get missed calls or sms from unknown numbers. If you want to know their real name then just follow this article.
There are number of tricks to trace mobile number in India and also in world wide. I am sharing one of the best tool which provides you Names and Telephone operators of most of the mobile numbers worldwide. If you search on Google, you will find many tools to trace mobile or phone number, but most of them are fake. They always give fake results and doesn't provide name of the mobile owner. But I'm sharing a special tools which is used by many peoples and provides real information of mobile number owner.


Just enter mobile number that you want to search and click on Trace. It will provide result for most of the numbers. Enjoy!

Trace Mobile Number Here -

Tuesday, 11 February 2014
Use Mobile Phone Camera As A USB Webcam

Use Mobile Phone Camera As A USB Webcam

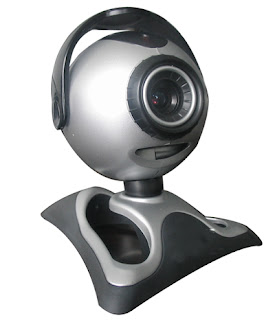
We know that many social networking websites such as "Facebook" and "Google Plus" have Video Chatting feature, & we know that to start video chatting we need a Webcam. Sometimes, webcam is not available and we can't start video chat with our friends. But after reading this article you can use your mobile phone camera as USB or Bluetooth Webcam !!!


Yes! You Can Use Your Mobile Camera As A Web Camera For Facebook, Yahoo, Skype Or Any Other Video Chatting Supported Websites. We are going to use a software "Mobiola"

Also Read -
Get Free Unlimited Mobile Recharge And Send Free SMS
How To Download & Install WhatsApp On PC Or Laptop
Install New Android 4.3 Camera and Gallery On Non Jelly Bean Phones


Requirements To Make Your Mobile Phone Camera As A USB Webcam -

1 - A Cell Phone with Camera.

2 - A USB Data Cable or Bluetooth Dongle to create connectivity between your Computer and your Cell Phone.

3 - And A Computer or Laptop.

You can use this trick with any kind of mobile phone such as Nokia, iPhone,Blackberry, Windows Mobile Phones, Symbian S60, Android.


First Of All, Trick For Nokia Java, Symbian S60, iPhone, Blackberry And Windows Mobile Phones -

Step 1 - Go to this link CLICK HERE and click on "Download" and select your mobile phone to start downloading the app.

Step 2 - Those who are using Java phones like Samsung, Sony Ericsson, Nokia 5300 ,Nokia 3500 etc. download this application from this link - CLICK HERE

Step 3 - Mobiola consists 2 parts. one is a Client Part and other one is a Server Part.

Step 4 - Install Server Part on your PC (.exe file) and install Client Part on your Mobile Phone (ie. .jar and .sis etc).

Step 5 - Run Mobiola Webcam on your Computer.

Step 6 - Run Mobiola Webcam on your Mobile Phone.

Step 7 - Connect your Mobile Phone to your PC by using a USB Data Cable or Bluetooth Dongle.

Step 8 - Now in your Cell Phone, go to Mobiola app and then go to Options, then Connect.

Step 9 - After that, select Bluetooth or USB (Whatever is connected between your Mobile Phone and PC) to create a connection...

Step 10 - After authentication all work is done.

Also Read -

    If You Are Using An Android Phone Then Follow These Steps To Turn Your Mobile Phone As A Webcam -

    Step 1 - Go to Android Market or Google Play Store on your Android Phone and search for A Application Named "USB Webcam".

    Step 2 - Download and install that application on your Android Phone and turn on USB debugging by going to Settings--> Application--> Development--> USB Debugging.

    Step 3 - If you are using Windows on your Computer then download Server for USB webcam from here - Click Here To Download

    Step 4 - If you are using linux on your computer, then download Server from Here - Click Here To Download

    Step 5 - Install Server on your Computer.

    Step 6 - This is a second last step. Connect your Cell Phone via USB Cable to your Computer.

    Click Here To Expand Last Step -

    Step 7 - After that, double click to open Server from your PC, and open Client app from your Cell Phone and Create A Connection.

    That's all... Now you can use your mobile phone camera as USB Webcam!
    Boot Your Android Device Into Safe Mode [How To]

    Boot Your Android Device Into Safe Mode [How To]

    Android is a relatively most stable mobile operating system as compared to Windows, Symbian or iOS. But every now and then, performance issues arise. Safe Mode is a great tool by which you can use to troubleshoot these issues. Safe mode boots your phone running only with the default apps that came with the phone, means no third party apps. So, if your phone runs without an issue when you’re in safe mode then it’s a pretty good bet that the problem is not system related and can be solved by uninstalling a third party app you downloaded.

    Safe Mode In Android

    Unfortunately, not all the phones have the same method to enter into safe mode. Most Jelly Bean devices use the method below. But some of the devices with older versions of Android and some newer devices like Galaxy S 4 and HTC One use the alternate method to boot into Safe Mode.

    Read this article for related tricks - TOP 10 USEFUL ANDROID HIDDEN TIPS AND TRICKS

    Steps To Enter Into Safe Mode -

    1 - Press and hold down the physical Power button on your device.
    2 - Long press the “Power Off” option that appears on the screen.
    Step 2 To Start Safe Mode In Android

    3 - A dialog box will apead asking you if you want to reboot your device into Safe mode. Tap OK. (Note - If the box doesn’t appears, go on to the alternate method. Alternate Method will be posted soon.)
    Step 3 To Start Safe Mode In Android


    4 - When the phone reboots, you should see a “Safe Mode” watermark at the bottom left side of the screen, to let you know that you are in safe mode.
    ScreenShot Of Safe Mode In Android


    You can’t use third party apps in safe mode. You can uninstall them if they are having any problem. So if your phone is giving you problems as bad as freezing or not letting you to uninstall installed apps, you can uninstall the problem app or apps in safe mode. In addition, if you need to, you can backup your data or factory reset your android device in safe mode .

    To exit safe mode, you just Restart your device as you normally would.
    Let me know if you have any questions!
    Monday, 10 February 2014
    How To Install & Use BlackBerry Messenger On Android

    How To Install & Use BlackBerry Messenger On Android

    In my last post is have explained Features of BlackBerry Messenger. In this post I will explain how to Install and use BBM on Android.
    So, you are using an Android device and want to chat with your BBM friends??? No problem!! BlackBerry Messenger is now available for not only BlackBerry users but Android and iOS as well. BlackBerry Messenger is totally free to use and it is a great way to stay in touch with your friends without the worry of text messaging or other bulky messaging apps.

    BlackBerry Messenger in Android

    Getting up and running with BBM on your Android device is easy, but if you are having trouble we are here to help. Keep reading for a full walkthrough of using BBM on your Android device.

    Getting Started...

    • First things first - you'll need an Android device to install BBM. 
    • Head to the Google Play Store and Download BBM (Free) To Your Device Here.
    • Once installed, tap on the icon to start the BBM service. 
    • If you're already a BBM user and want to use your current BBID, enter your login details on the screen. If you're new to BBM or want to use a different BBID, you can register here as well.

    Adding Contacts...

    Adding Contacts in BlackBerry Messenger
    • Tap the overflow icon (3 dots).
    • Tap Invite to BBM.
    • Choose the method by which to invite a contact.
    • Enter any info as needed.
    • When the contact accepts your request they will be added to your contact list.

    Sending Messages...

    Sending Messages From BlackBerry Messenger
    • To start a new chat, tap the BBM icon in the top right corner (the one with the + sign).
    • Search for or choose a contact from the list.
    • Tap the contact, enter your message and choose Send.

    Multiperson Chat...

    • To start a multiperson chat with more than one contact, tap the overflow icon (3 dots) then tap Start Multiperson Chat.
    • Enter the contacts to which you want to send your message.
    • Enter you message and tap Send.

    Settings...

    Change Setting In BlackBerry Messenger
    • To access the settings menu, tap the overflow icon (3 dots) then choose Settings.
    • Here you can change things such as notification tone, contact list layout, update options, chat history and more.

    Groups...

    Creating Groups In BlackBerry Messenger
    • To create a group, tap the Groups icon on the bottom of the screen.
    • Tap the overflow icon (3 dots) then choose Create New Group.
    • Enter a group name, photo and description.
    Groups In BlackBerry Messenger
    • After your group is created, tap the group icon to open it. From here use the overflow menu (3 dots) to change settings, invite contacts, add photos, add lists, add events and more.

    Broadcast Message...

    • To send a broadcast message to all of your contacts, tap the overflow icon (3 dots) then choose Broadcast Message. Enter your message and tap Send. 

    Quick Tips...

    • To quickly view your contacts list, tap the Contacts icon.
    • To quickly view groups tap the Groups icon.
    The BBM service will stay running in the background of your device. You will see a small BBM icon in your notification bar so you know that the service is active and ready to send or receive messages. You can disable this setting, however this will keep BBM in the background and you may miss messages at times, so it's best to just deal with it and keep it in the foreground.

    Download BlackBerry Messenger (BBM) For Android

    Download BlackBerry Messenger (BBM) For Android

    The OFFICIAL version of BBM™ from BlackBerry is now here for Android! Get the free BBM app for the best way to stay connected with friends and family. Download it now!


    Chat with friends on Android, BlackBerry and iPhone...

    • BBM is always on and always connected – no app to open.
    • Know when messages have been delivered (D’s) and read (R’s).
    • Share photos, files, documents, voice notes and more.
    • See when contacts are responding to your message.
    • Emoticons for every mood and emotion let you express yourself.


    BBM lets you protect your privacy. You control it...

    • You chose how to share your information - BBM uses PINs instead of phone numbers or email addresses so that it's more private, and you always control who can contact you.
    • You chose your contacts – 2-way opt-in means you have control over who is able to message you.

    Chat and Share with many at once...

    • Groups – BBM groups help you share pictures, lists, and appointments with group members. You can even be in a group with people who aren't part of your own BBM contact list.
    • Multi-person chats – Invite multiple contacts to have a chat together.
    • Broadcast messages – Send a message to multiple BBM contacts at one time.

    Create your own BBM profile...

    • Post a profile picture using images, pictures or even animated pictures (GIFs).
    • Update your status to let people know what you’re up to or how you feel


    Download BBM for free today!

    Print From iPad & iPhone Directly To Any Printer

    Print From iPad & iPhone Directly To Any Printer

    Smartphones & Tablets  have simplified our lives to a greater extent. We can access Internet, capture photographs, watch Movies, listen to our favorite music, play games and also complete last minute college work irrespective of the time of the day or place. You only require is the right application. However, despite this, there have been some complaints. The most common problem with regard to Apple devices has been the inability to Print Documents directly from an iPad because neither the iPad nor the iPhone has USB connection ability. Thus, it was difficult to transfer documents directly from the iPad to a printer.
    Apple Logo

    Apple was very quick to realize this major problem and resolved it in the latest versions of its Operating Systems. iPads powered by the latest version of iOS can use the AirPrint Technology to print documents directly from an iPad by enabling a transfer to an AirPrint-compatible printer.

    AirPrint Technology for Wireless Printing


    The AirPrint feature was one of the major upgrades that shipped with the latest Apple operating system iOS having 4.2 version. This Apple feature prints via Wi-Fi. It was developed in partnership by Apple Inc and HP. For this reason of partnership, most of the HP laser printer models are compatible with this wireless printing technology. You do not haveto  install any drivers or download any software for this. Another most important advantage of this system is you can continue using the iPad to use camera, surf internet, play games, watch videos and listen music while it continues printing process in the background.


    Here's List Of Some Compatible HP Photosmart Plus e-AiO Printers:


    • Photosmart e-AiO D110
    • Photosmart Wireless e-AiO B110
    • Photosmart Plus e-AiO B210
    • Photo Smart Premium e-AiO B310
    • Photosmart Premium Fax e-AiO C410
    • HP ENVY e-Aio D410
    • Photosmart eStation C510


    These HP Photosmart Wireless e-AiO printers will require a firmware upgrade to work with AirPrint:

    • LaserJet Pro M1536dnf Multifunction Printer
    • LaserJet Pro CM1415fn Color Multifunction Printer
    • LaserJet Pro CM1415fnw Color Multifunction Printer
    • LaserJet Pro CP1525n Color Printer
    • LaserJet Pro CP1525nw Color Printer


    How To Print From iPad Using AirPrint?

    1 - The procedure to print using AirPrint is very easy. We have listed all the steps below.
    The first step involves connecting a wireless Printer compatible with AirPrint technology to your Wi-Fi network.
    (Not all printers, especially the old models of printers, are compatible with this printing technology.)
    HP has a range of AirPrint-enabled printers. The procedure of setting up the entire system varies depending on the make and the model. You should carefully read the instruction manual provided or the manufacturer's website for all instructions.

    2 - Once the setup is complete, turn on you printer. Wait for the printer to detect and connect to your Wi-Fi network. On most of the models of printer a small light blinks as soon as the printer establishes connectivity with your Wi-Fi network.

    3 - An "Action" button will be displayed on your iPad or iPhone. Click that button.

    4 - After this, tap "Print" button.

    5 - When prompted, select the "Select Printer" option. Select the printer you are using.

    6 - A dialogue box will appear on your screen. Make the necessary changes such as the pages that to be printed, double-side printing and number of copies.  Hit the Print option when you're done.


    The AirPrint technology is one of the Best methods to print documents from your iPad. Use of third party applications is an alternate method. They can be downloaded for free or can be purchased at the Apple Store.

    So now, you don't have to wonder how to print from an iPad or iPhone! AirPrint and some other third party applications will help you to print documents directly without having to first transferring them to other devices.
    Quick Message
    Press Esc to close
    Copyright © 2014 Mobile Tricks | Designed and Bloggerised By Pradeep Jadhav